Setting Up Drums in Small Spaces: 6×6-Foot Room Guide
You’ll need a minimum 6×6-foot space with 13-foot ceilings for proper drum acoustics, though smaller rooms work with strategic planning. Choose compact kits featuring 18-20″ bass drums, 13-14″ snares, and lightweight hardware to maximize playing area while minimizing footprint. Electronic drums operate at quieter 60-75 decibels versus acoustic’s 90-120 decibels, making them ideal for shared walls. Position your kit away from corners, install bass traps and absorptive panels for sound control, and utilize wall-mounted storage to free floor space-there’s much more to optimize your setup.
We are supported by our audience. When you purchase through links on our site, we may earn an affiliate commission, at no extra cost for you. Learn more.
Notable Insights
- Ensure minimum 6×6-foot space with 13-foot ceiling height using Golden Mean Proportions for optimal drum placement and acoustic performance.
- Choose compact 18-20″ bass drum and 13-14″ snare with lightweight hardware to maximize playing area while maintaining sound quality.
- Install corner bass traps and first reflection point panels to control low-frequency buildup and reduce harsh slap-back echoes.
- Consider electronic drums (60-75 dB) over acoustic (90-120 dB) for shared walls and noise-sensitive environments with neighbors.
- Utilize wall-mounted storage, wheeled racks, and vertical solutions to keep floor space clear while maintaining easy equipment access.
Space Requirements and Room Dimensions for Drum Setups
When I first started setting up drum kits in cramped spaces, I quickly learned that proper room dimensions aren’t just suggestions-they’re the foundation that determines whether your drums will sound powerful or like cardboard boxes in a closet.
You’ll need a minimum 6×6-foot drum space for comfortable reach to all components, though I’ve squeezed kits into smaller areas with creative positioning.
Room dimensions become critical when you consider ceiling height-those standard 8-foot ceilings will crush your low-end frequencies faster than you can say “standing wave.”
For decent acoustics, you’re looking at 13-foot minimum ceiling height, which gives those 30-foot bass wavelengths room to breathe instead of bouncing around like ping-pong balls in your confined space. The kick drum’s energy can reach down to the 40-cycle range, demanding significant vertical distance to properly dissipate without creating muddy, compressed tones that plague most home studio setups. If you’re working with an existing rectangular room, consider following the Golden Mean Proportions of 1:1.6:2.6 for height, width, and length to achieve more predictable acoustics that work better for drum recording.
Selecting the Right Drum Kit Components for Compact Areas
When you’re working with limited space, I’ve learned that choosing the right drum components becomes a careful balance between functionality and footprint, requiring you to prioritize essential pieces while considering whether compact hardware or electronic alternatives better serve your specific needs.
You’ll need to strip down to the core elements-typically a bass drum, snare, one or two toms, and minimal cymbals-while exploring hardware solutions that maximize your setup’s efficiency through multi-functional stands, direct mounts, and foldable components that can disappear when not in use. For extremely tight spaces, consider air drumming systems that use only sticks and foot pedals, eliminating physical drums entirely while maintaining the drumming experience. When acoustic drums aren’t feasible, practice pads with realistic rebound and snare simulation can maintain your muscle memory and technique development within the smallest possible footprint.
The decision between acoustic and electronic drums often comes down to your sound requirements, noise restrictions, and whether you value the tactile response of traditional shells or the space-saving versatility of digital pads and modules. Portable options like the GAMSING Electronic Drum Set demonstrate how lightweight designs at just 1.43 pounds can provide a complete drumming experience while taking up minimal storage space. Additionally, investing in quality wireless microphone systems can enhance your recording capabilities without adding bulky cable runs that consume precious studio real estate.
Essential Kit Components Only
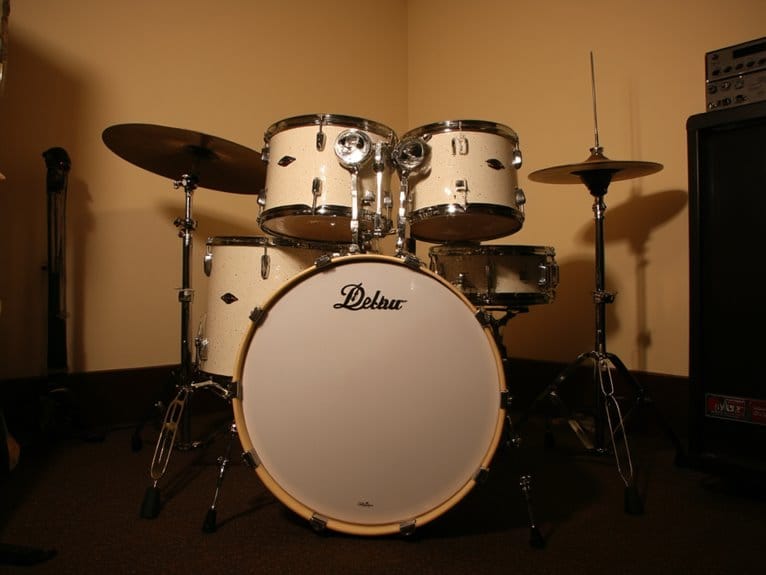
Three fundamental components form the backbone of any functional drum kit, and I’ve learned through years of cramped studio sessions that selecting the right sizes can make or break your playing experience in tight quarters. Your bass drum should measure 18″-20″ diameter instead of the standard 22″, maintaining that essential low-end punch while dramatically improving space efficiency. The snare drum works best at 13″-14″ diameter with shallow 5-6″ depth, and hi-hats become your rhythmic anchor. For apartment dwellers or shared spaces, consider electronic drum sets with mesh pads that deliver responsive dynamics while maintaining quiet practice capabilities. Modern digital kits feature dual-zone mesh heads that enhance dynamic response and sound variations while keeping noise levels apartment-friendly. For musicians seeking even greater space efficiency, drum machines offer portable solutions that eliminate the need for physical drums while delivering authentic sounds through compact, lightweight designs.
| Component | Recommended Size | Space Benefit |
|---|---|---|
| Bass Drum | 18″-20″ diameter | 30% less floor space |
| Snare Drum | 13″-14″ x 5″-6″ | Compact positioning |
| Hi-Hats | 12″-13″ cymbals | Lightweight, foldable stand |
These drum sizes create maximum versatility without overwhelming your studio room’s acoustics or physical constraints.
Compact Hardware Solutions
Hardware selection becomes your next challenge once you’ve nailed down the right drum sizes. I’ve discovered that choosing the wrong stands can turn even the most compact kit into a cluttered nightmare that defeats the entire purpose of downsizing.
You’ll want compact hardware that prioritizes a minimal footprint without sacrificing stability, which means investing in direct-mounted tom holders that eliminate bulky stands entirely.
Bass drum risers prove vital for maintaining pedal accuracy while micro stands and aluminum alloy components reduce weight considerably.
I’ve found that modular hardware systems work best since they allow you to reconfigure setups for different spaces.
Collapsible cymbal stands become essential when you’re constantly adapting to varying room constraints and storage limitations. Having a reliable drum key ensures you can make quick tuning adjustments when your compact setup affects the sound quality in your small studio space.
For hi-hat setups specifically, look for stands with rotating bases that provide versatility in cramped configurations where every inch of positioning matters.
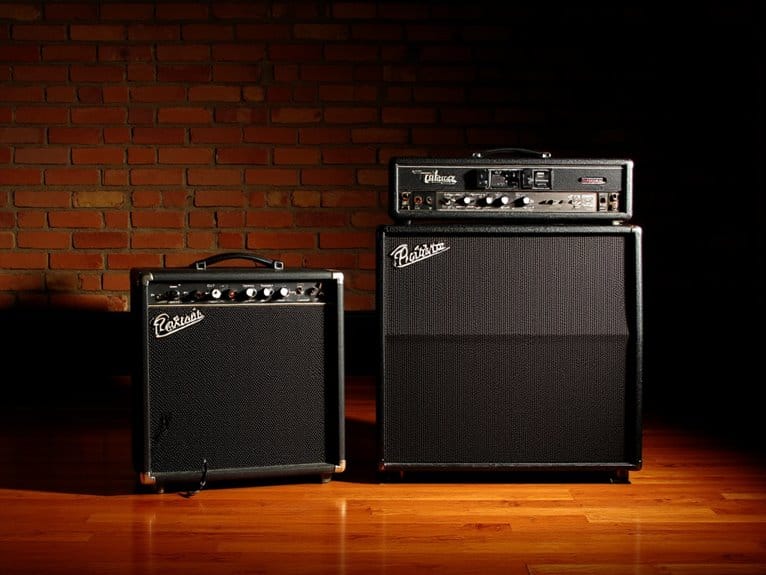
Electronic Vs Acoustic
Since choosing between electronic and acoustic drums represents the most fundamental decision you’ll make for your compact setup, I’ve learned that understanding the trade-offs between these two approaches can save you from costly mistakes and endless frustration down the road.
| Feature | Electronic | Acoustic |
|---|---|---|
| Volume Level | 60-75 decibels, headphone-compatible | 90-120 decibels, requires hearing protection |
| Space Requirements | Compact rack system, easily portable | Larger footprint, challenging transport |
| Sound Options | Hundreds of preset kits, instant switching | Natural resonance, limited customization |
Your sound sensitivity and practice preferences will ultimately determine which path works best, though I’ve found electronic kits consistently deliver more flexibility for small-space drummers who need volume control and versatility. Many budget-friendly electronic kits now feature mesh pad technology that provides an authentic drumming feel while significantly reducing noise levels, making them particularly suitable for apartment practice sessions. For recording sessions, selecting microphone stands with proper height adjustability becomes crucial whether you’re capturing direct electronic outputs or miking acoustic drums in confined spaces. When connecting electronic drums to amplification systems, consider that impedance compatibility with speakers ensures optimal sound reproduction and prevents equipment damage.
Acoustic Treatment and Sound Control in Small Rooms
When you’re setting up drums in a small space, you’ll quickly discover that raw acoustic energy bouncing off nearby walls can turn your tight, punchy kit into a muddy, echo-laden mess that no amount of tuning can fix.
The key lies in understanding three critical areas: treating your room’s surfaces to control reflections and resonance, implementing practical sound isolation techniques that won’t break the bank or require major construction, and positioning your microphones strategically to capture the best possible sound while minimizing the acoustic problems inherent in compact spaces.
I’ve learned through countless sessions in cramped basement studios and bedroom setups that addressing these fundamentals systematically, rather than hoping expensive gear will compensate for poor acoustics, makes the difference between recordings that sound professional and those that scream “amateur hour.”
Your monitor speakers play a crucial role in this process, as achieving flat frequency response allows you to hear exactly what your drums sound like in the treated space without coloration that could mislead your mixing decisions.
To capture this improved acoustic environment effectively, you’ll need an audio interface with zero-latency monitoring capabilities that allows you to hear your drum performance in real-time without the delays that can throw off your timing during recording sessions. Understanding polar patterns becomes essential when selecting microphones for your small space setup, as cardioid and super-cardioid patterns help reduce unwanted bleed between drums and minimize pickup of room reflections that could muddy your recordings.
Room Treatment Essentials
As someone who’s spent countless hours wrestling with terrible drum room acoustics, I can tell you that proper acoustic treatment transforms even the most problematic small spaces into surprisingly workable recording environments. Your first priority should be installing absorptive panels at first reflection points, particularly behind your kit and on opposing walls, which eliminates the harsh slap-back that makes small rooms sound boxy. Corner-mounted bass traps handle low-frequency buildup that causes muddiness, while strategic diffusion panels scatter remaining reflections without completely deadening your space. When selecting microphones for your treated drum room, prioritize models with signal-to-noise ratios above 80 dB to ensure your acoustic improvements translate into professional-quality recordings. For drummers in apartments or noise-sensitive environments, incorporating practice pads alongside acoustic treatment provides the flexibility to maintain consistent training without disturbing neighbors.
| Treatment Type | Primary Function | Ideal Placement |
|---|---|---|
| Absorption Panels | Reduce reverberation | First reflection points |
| Bass Traps | Control low frequencies | Room corners |
| Diffusers | Scatter reflections | Rear walls, ceiling |
| Soft Furnishings | Natural absorption | Throughout space |
| DIY Solutions | Cost-effective treatment | Problem areas |
Sound Isolation Techniques
While acoustic treatment controls how sound behaves within your drum room, sound isolation tackles the equally critical challenge of keeping that sound from escaping to annoy neighbors, family members, or anyone unfortunate enough to be in adjacent spaces.
Effective soundproofing strategies start with your walls and ceiling, where adding mass through multiple drywall layers or mass loaded vinyl creates the first barrier against sound transmission. I’ve found that resilient isolation clips work remarkably well for decoupling drywall from studs, preventing vibrations from traveling through your home’s structure.
Don’t overlook your floors either-rubber underlayment beneath flooring surfaces can boost your sound transmission class by 15-20 points, while strategic use of acoustic materials like heavy carpeting provides additional impact noise reduction. Similar to how solid wood construction delivers superior tonal quality in acoustic guitars, your drum room’s structural materials significantly impact the final sound quality you’ll achieve.
When recording drums in your treated space, pairing your isolation efforts with a quality audio interface that offers zero-latency monitoring will ensure you can capture tight, professional recordings without the delays that can throw off your timing. For optimal recording quality, ensure your audio interface maintains a signal-to-noise ratio exceeding +90 dB to capture the full dynamic range of your drum performance.
Microphone Placement Strategies
Once you’ve controlled how sound behaves within your drum room through isolation and treatment, the next challenge involves strategically positioning microphones to capture the best possible sound while working within your space’s acoustic limitations.
In smaller rooms, I’ve found that using minimal microphone techniques works best-typically just kick, snare, and one or two overheads to avoid phase complications.
For stereo miking, position room mics about six feet in front of your kit and six to seven feet high, angled down at forty-five degrees toward the center. Alternatively, try parallel placement with two mics on either side, roughly ten feet apart, targeting outer cymbals for wider stereo imaging.
Large diaphragm condensers capture ambient detail beautifully, though dynamic mics like the SM57 perform surprisingly well in treated spaces.
Choosing Between Electronic and Acoustic Drum Sets
Which drum kit should you choose when space is at a premium – the thunderous authenticity of acoustic drums or the whisper-quiet convenience of their electronic counterparts?
Your sound preferences and playing experience will largely determine this decision, though space constraints often make the choice for you.
Electronic kits operate at conversational volumes of 60-75 decibels, while acoustic drums blast at motorcycle-level intensities of 90-120 decibels.
If you’re sharing walls with neighbors, electronic drums offer near-silent practice capabilities that won’t result in angry knocks at your door.
However, acoustic drums provide superior tactile feedback and natural resonance that samples can’t fully replicate, challenging you to develop stronger technique through their unforgiving, authentic response.
For compact spaces, roll-up designs offer the ultimate portability solution, easily transforming any flat surface into a practice pad while taking up virtually no storage space when not in use.
Strategic Layout and Ergonomic Positioning
After selecting your drum set type, the physical arrangement within your limited square footage becomes a calculated game of spatial chess, where every inch counts and poor positioning can transform your musical sanctuary into an acoustic nightmare.
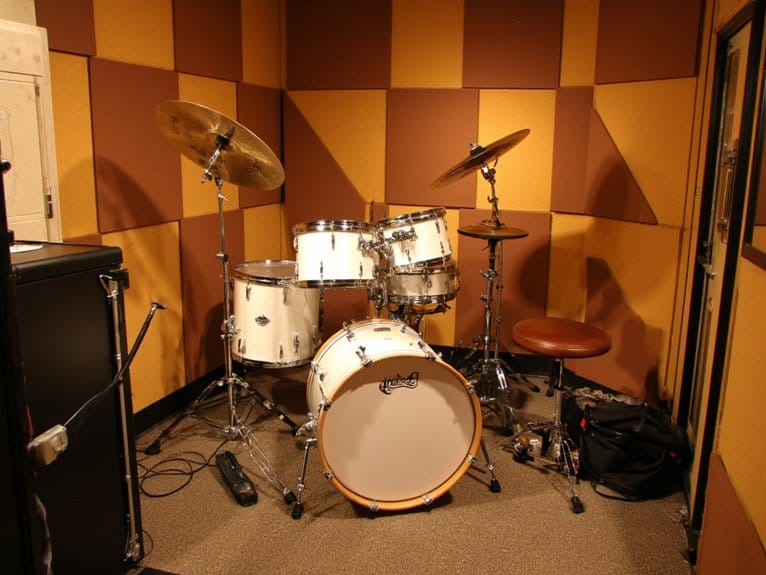
Smart drum positioning starts with centering your kit away from corners, which I’ve learned prevents bass buildup that’ll muddy your sound faster than you can say “standing wave.”
Player comfort depends on these strategic considerations:
- Maintain easy reach between all drums and cymbals to prevent cramped, awkward stretching
- Keep your stool adjustable for proper posture and reduced fatigue during extended sessions
- Choose compact drum sizes to maximize your playing area without sacrificing tone
- Position hardware thoughtfully to optimize hitting angles while avoiding wall collisions
This methodical approach guarantees you’ll create an efficient, comfortable setup that maximizes both your space and playing potential.
Essential Equipment and Gear for Small Drum Studios
While positioning your drums correctly sets the foundation, selecting the right equipment transforms your cramped quarters into a functional recording environment that’ll capture professional-quality sounds without breaking your budget or your back.
Start with minimal microphones-one or two condenser overheads, plus dynamic mics like the trusty Shure SM57 for snare and an AKG D112 for kick-to avoid phase issues that plague small rooms. Your audio interface becomes critical here, since quality preamps compensate for acoustic limitations.
Recording techniques improve dramatically with proper drum accessories: boom stands with low profiles, shock mounts to reduce vibrations, and clamp-mounted tom mics like the Sennheiser e604 that maximize positioning options.
Don’t overlook cable organizers and dampening gels, which control overtones while maintaining clean signal paths in your confined workspace.
Storage Solutions and Multi-Purpose Room Arrangements
Since your drum studio doubles as a living space, bedroom, or home office, smart storage becomes the difference between creative inspiration and daily frustration-trust me, I’ve stepped on enough cymbal stands at 2 AM to know.
Smart storage transforms chaos into creativity-because stepping on drum hardware in the dark teaches you organizational priorities fast.
Effective shelving systems and organizational tools transform cramped quarters into functional creative spaces.
Here’s how to maximize your multi-purpose room:
- Install adjustable shelving units (18″ deep, 48″ wide) with carpet liners to protect drums while creating workstation surfaces.
- Mount wheeled storage racks that reconfigure quickly when switching between practice and daily life.
- Use wall-mounted hooks and vertical racks to free floor space for movement and activities.
- Implement color-coded containers for accessories, ensuring quick retrieval during sessions.
These solutions maintain accessibility while keeping your living space presentable.
Frequently Asked Questions
Can I Practice Drums in an Apartment Without Disturbing Neighbors?
You can practice drums in apartments using electronic kits with headphones, drum pads for silent practice, and noise reduction techniques. Communicate with neighbors, practice during reasonable hours, and consider isolation platforms to minimize vibrations.
How Much Does It Cost to Soundproof a Small Drum Room?
You’ll spend $4,000-$8,000 soundproofing a small drum room, depending on materials chosen. Cost estimates vary based on room size and soundproofing materials like mass loaded vinyl, acoustic sealant, and specialized doors affecting your final budget.
How Do I Maintain Proper Ventilation While Keeping Sound Contained?
You’ll need specialized ventilation solutions like ERVs that exchange air without compromising sound isolation. Install acoustic-lined ducts, seal all joints with acoustic sealant, and use sound baffles around vents to maintain airflow while containing drum noise.
On a final note
You’ve got all the tools you need to transform that cramped space into a functional drum studio. Whether you’re going acoustic with strategic placement, electronic for volume control, or hybrid for versatility, your room’s limitations don’t have to kill your groove. Smart storage, proper treatment, and ergonomic setup will keep you drumming comfortably. Now stop overthinking it and start playing-your neighbors will thank you later.