Understanding Audio Signal Flow and Cable Routing
Understanding audio signal flow means tracing your sound from source to speakers through a carefully orchestrated chain of components. Your microphone captures analog voltage representing sound waves, which travels through XLR or TRS cables to preamps that boost signal strength and clarity. From there, you’ll route through mixers using direct, parallel, or bus configurations, with proper gain staging maintaining -12 to -14 dBFS levels to prevent distortion while preserving quality, and mastering these fundamentals reveals professional-grade results.
We are supported by our audience. When you purchase through links on our site, we may earn an affiliate commission, at no extra cost for you. Learn more.
Notable Insights
- Audio signals begin as analog voltage and travel through XLR, TRS, or RCA cables designed for specific applications.
- Mixing consoles use direct, parallel, serial, and bus routing methods to manage signal paths effectively through the system.
- Patchbays enhance flexibility with half-normal configurations that allow signal multing and instant processor bypassing for workflow efficiency.
- Proper gain staging requires maintaining -12 to -14 dBFS levels while preserving unity gain between each processing stage.
- Physical separation between power and audio cables reduces electromagnetic interference by approximately 40% for cleaner signal transmission.
The Fundamentals of Audio Signal Path
When I first started working with audio equipment, I’ll admit the concept of signal flow seemed unnecessarily complicated, but understanding how audio travels from source to destination is actually straightforward once you grasp the basic principles.
Your audio signal begins as analog voltage representing sound waves, then travels through various cable types—XLR, TRS, or RCA—each designed for specific signal types and applications. For complex setups involving multiple channels, audio snakes provide an efficient solution by consolidating numerous signal paths into a single cable run, reducing clutter and simplifying cable management.
Understanding cable types—XLR for balanced signals, TRS for instruments, RCA for consumer gear—ensures your audio reaches its destination with minimal interference.
Audio interfaces handle digital conversion through ADCs and DACs, transforming analog signals into binary data for processing, then back to analog for playback. Modern interfaces achieve ultra-low latency performance of just 2.5 ms round trip at higher sample rates, ensuring real-time monitoring without noticeable delays. Managing multiple gain stages throughout the signal path prevents unwanted artifacts and maintains optimal sound quality at each processing point.
Proper grounding techniques and quality cables guarantee noise reduction throughout the chain, while analog processing components like preamps and EQs maintain frequency response integrity, creating a seamless path from microphone to speaker. DI boxes play a crucial role in this signal chain by providing electrical isolation and impedance matching to prevent damage and ensure optimal signal transfer between instruments and recording equipment. Digital audio files store these signals as discrete numerical values with specific sampling rates that determine the quality and accuracy of the recorded sound.
Essential Components and Stages in Signal Flow
Now that you understand how signals move through the chain, let’s examine each component that shapes your audio from capture to playbook.
Different microphone types—dynamic, condenser, and ribbon—each offer unique sensitivity characteristics that affect your initial signal clarity.
Preamp importance can’t be overstated, as it establishes your foundation for audio fidelity throughout the entire chain. Dynamic microphones like the SM7B require substantial gain capabilities, often 60dB or higher, to achieve optimal signal levels for professional recording applications.
Your EQ settings shape tonal balance, while compression techniques control dynamic range to maintain consistent levels.
Mixer functions include routing strategies that direct signals through various pathways, utilizing different cable types for ideal transmission. Understanding signal flow becomes increasingly important as system size grows and more components are added to affect the audio path.
These output options, whether balanced XLR or unbalanced connections, directly impact your final sound quality and determine how effectively your processed audio reaches listeners. Modern audio interfaces often feature zero-latency monitoring for real-time feedback during recording sessions. Proper cable routing ensures signal integrity throughout the chain, much like how locking tuners maintain stability in guitar tuning systems.
Signal Routing Techniques and Configuration
When you’re working with professional audio equipment, you’ll encounter two fundamental approaches to signal routing that form the backbone of any serious recording or mixing setup: mixing console routing methods and patchbay configuration strategies.
I’ve found that mastering these techniques, while initially intimidating with their maze of inputs, outputs, and channel strips, becomes second nature once you understand how each method serves different workflow requirements and session complexities.
Your choice between console-based routing, with its tactile faders and dedicated signal paths, versus patchbay configurations, with their flexible cable-based connections and modular approach, will ultimately depend on your specific needs, budget constraints, and the complexity of your audio projects.
Modern setups often integrate audio interfaces that provide USB-C connectivity and phantom power, bridging the gap between traditional analog routing methods and digital recording workflows.
Mixing Console Routing Methods
Four fundamental routing methods form the backbone of every mixing console’s signal architecture, and I’ve found that understanding these pathways transforms how you’ll approach both recording sessions and live sound reinforcement.
Direct routing provides the cleanest signal distribution from source to destination, bypassing intermediate processing when you need pristine recordings.
Parallel paths excel at sound design, splitting signals to multiple channels for simultaneous effect processing while maintaining the original dry signal.
Serial routing chains processors sequentially, building cumulative effects through your channel strip’s preamp, EQ, and dynamics sections.
Bus routing combines multiple inputs into group outputs, creating submixes that enhance mixing strategies and routing efficiency. Professional audio applications benefit from maintaining high signal-to-noise ratios above 80 dB to ensure optimal signal quality throughout the routing chain.
Each method offers distinct audio flexibility, allowing you to craft professional mixes through strategic signal management and creative processing techniques. Modern mixing consoles support XLR inputs and 1/4-inch jacks to accommodate various audio sources and maintain signal integrity throughout your routing chain.
Patchbay Configuration Strategies
While routing methods establish your console’s signal architecture, patchbays transform that foundation into a flexible, reconfigurable nerve center that I’ve come to view as the most underutilized tool in modern studios.
Understanding normalling types becomes essential for maximizing patchbay flexibility, as half-normal configurations allow signal multing while maintaining default paths.
You’ll find that configuring different normalling types per channel creates diverse routing options, enabling parallel processing where one source feeds multiple processors simultaneously.
I’ve learned that organizing your signal organization by grouping outputs on top rows, inputs below, dramatically improves workflow efficiency during complex sessions.
Strategic patchbay configuration lets you chain processors, bypass effects instantly, and reconfigure signal paths without unplugging gear, making your studio exponentially more productive.
Common Problems and Troubleshooting Methods
I’ve spent countless hours tracking down mysterious audio problems, and I can tell you that most signal flow issues fall into predictable categories that you can systematically diagnose with the right approach.
When you’re facing signal loss, start by following the entire signal path from microphone to speakers, checking each connection point methodically. Swap suspected cables with known good ones to isolate problems quickly, and verify that all intermediate hardware maintains proper power status for continuous signal processing.
These troubleshooting techniques become second nature once you understand common failure points: loose connections, grounding loops causing unwanted hum, RF interference from nearby devices, and incorrect cable types creating signal degradation. Professional audio interfaces with zero-latency monitoring can help isolate timing-related issues that might masquerade as signal flow problems.
Strategic equipment positioning, proper cable labeling, and maintaining spare fuses will save you significant downtime during critical moments. Additionally, ensure your mixer provides adequate phantom power for condenser microphones, as insufficient power can cause intermittent signal drops and poor audio quality.
When using external preamps in your signal chain, verify that you’re achieving proper gain structure to maintain transparency and avoid introducing unwanted noise during quiet recordings.
Signal Levels and Gain Staging Principles
Once you’ve mastered troubleshooting techniques and can identify where problems occur in your signal chain, the next logical step involves understanding how to enhance signal levels throughout that entire path, because even perfectly connected equipment won’t deliver professional results if you’re not managing gain staging properly.
I’ve learned that proper gain staging means adjusting audio levels at each point in your signal path, targeting around -12 to -14 dBFS in digital systems while maintaining unity gain between stages.
You’ll want to start at your source, setting input levels according to your loudest passages, then maintain consistent levels through each subsequent stage—preamps, compressors, interfaces, and DAW tracks—ensuring optimal signal-to-noise ratio without introducing distortion or clipping. Professional interfaces with dynamic range specifications of 120dB or higher provide the clarity needed to distinguish subtle level differences during critical gain staging adjustments.
For optimal audio quality, aim for a signal-to-noise ratio above 80 dB, as this specification is essential for achieving professional-grade sound reproduction throughout your signal chain.
Quality audio interfaces with preamps offering at least 60 dB of gain provide the headroom necessary for proper gain staging, especially when working with dynamic microphones or low-output sources that require significant amplification.
Practical Applications Across Different Audio Systems
Now that you’ve grasped the fundamentals of signal levels and gain staging, you’ll find these principles manifest differently across various audio environments, each presenting unique challenges and requirements for ideal signal flow management.
Your home audio system, while seemingly straightforward, demands careful attention to impedance matching and signal routing between components like receivers, amplifiers, and speakers to achieve clean, distortion-free reproduction. Understanding wattage impacts the overall performance and sound quality of your system, particularly when matching amplifiers to speakers for optimal signal transfer.
Professional studio setups, conversely, require you to navigate complex signal chains involving multiple preamps, processors, and monitoring systems, where precise gain structure becomes critical for maintaining audio fidelity throughout recording, mixing, and mastering processes. Modern interfaces often feature Auto Gain modes that automatically optimize input levels to prevent clipping and maintain consistent signal quality during complex recording sessions.
Audio interfaces serve as the crucial bridge between analog and digital domains, with professional-grade units providing 24-bit/192kHz conversion rates that capture the full dynamic range and detail of your source material.
Home Audio Systems
Understanding home audio systems becomes considerably easier when you trace the signal’s journey from source to speaker, as most consumer setups follow predictable patterns that I’ve encountered countless times in various living rooms and entertainment spaces.
Your receiver functions as the central command center, managing audio source connections from streaming devices, Blu-ray players, and turntables through HDMI, RCA, or optical inputs. Modern receivers decode digital audio formats like Dolby Atmos, creating immersive audio experiences through proper surround sound positioning.
When planning system upgrades, I recommend considering cable length considerations for speaker wire types, ensuring you’ve got enough reach without tension.
Sound stage configuration depends heavily on acoustics optimization, with receiver functionalities handling multichannel routing to create that three-dimensional soundscape you’re after.
Professional Studio Setups
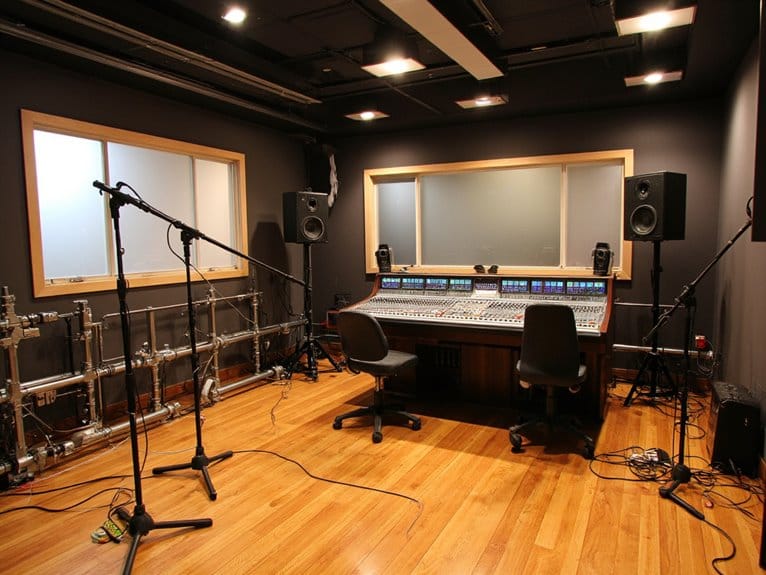
Professional studios represent the pinnacle of audio signal flow complexity, where I’ve witnessed engineers orchestrate dozens of simultaneous channels through meticulously planned routing systems that would make home audio setups look like child’s play.
When you’re designing these sophisticated environments, you’ll need to take into account multiple interconnected components that work together seamlessly.
- Color-coded cables and extensive labeling systems prevent routing disasters during critical sessions
- Patch bays centralize connections, allowing flexible re-routing without crawling behind equipment racks
- Balanced XLR and TRS connections minimize noise across extended cable runs
- Word clock generators synchronize digital devices, preventing timing issues in complex workflows
- Acoustic treatment at reflection points guarantees accurate monitoring for professional mixing decisions
Modern studio designs prioritize workspace ergonomics alongside signal integrity, creating environments where technical excellence meets human comfort. Many professional setups utilize XLR to USB adapters to interface traditional microphones with digital recording systems, bridging analog and digital domains efficiently. Quality directional microphones serve as critical input sources in these professional signal chains, requiring careful placement and positioning to capture optimal audio while maintaining proper signal-to-noise ratios throughout the entire routing system.
Best Practices for Cable Management and Signal Integrity
Three fundamental principles form the backbone of effective cable management in audio systems: separation, organization, and maintenance, each playing an essential role in preserving signal integrity while creating a workspace that’s both functional and safe.
You’ll want to maintain physical cable separation between power and audio lines, reducing electromagnetic interference by approximately 40% while preventing signal degradation that can compromise your recordings.
Smart bundling techniques using Velcro straps and cable sleeves keep similar functions grouped together, while proper routing practices along desk edges and cable trays eliminate tripping hazards by around 30%.
Regular maintenance tips include inspecting connectors for wear and cleaning dust buildup.
These installation aesthetics aren’t just about looking professional—they’re about interference reduction and systematic cable organization that actually improves performance.
Frequently Asked Questions
What Is the Difference Between Balanced and Unbalanced Cable Connections?
You’ll find balanced signal advantages include superior noise rejection and longer cable runs, while unbalanced cable drawbacks involve increased susceptibility to interference and limited distance effectiveness in professional audio applications.
How Do I Choose the Right Cable Length for My Setup?
You’ll want to measure your setup’s distance requirements first, then add 10-20% extra for cable management flexibility. Consider length considerations like signal degradation over distance and choose appropriate wire gauge accordingly.
What Causes Ground Loops and How Do I Eliminate Them?
Ground loops occur when you’ve got multiple ground paths between connected equipment, creating unwanted current flow that produces hum or buzz. You’ll achieve noise reduction by using shared power outlets, ground lift adapters, or isolation transformers.
Should I Use Expensive Cables or Are Budget Options Sufficient?
Budget cables are sufficient for most users since cable quality rarely creates audible performance impact. You’ll get excellent value from mid-range options like Monoprice, saving money for components that actually affect sound quality.
On a final note
You’ve now got the foundation to tackle any audio routing challenge, whether you’re setting up a home studio or troubleshooting a live sound rig. Remember, proper signal flow isn’t just about moving audio from point A to point B—it’s about maintaining quality, minimizing noise, and creating reliable connections. Keep your cables organized, monitor your levels carefully, and don’t be afraid to trace that signal path when things go wrong.