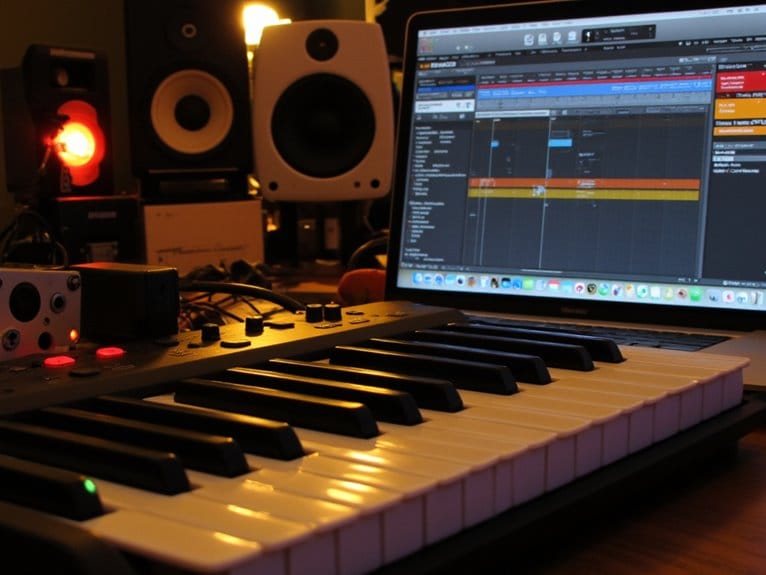
Connect a MIDI Keyboard to Your Computer & DAW (Step-by-Step)
To connect your MIDI keyboard to your computer and DAW, you’ll start by plugging in the USB cable directly to your computer-avoid USB hubs since they can cause connection issues. Most modern keyboards are plug-and-play, but you might need to download specific drivers from the manufacturer’s website for full functionality. Once connected, open your DAW’s preferences menu, enable MIDI input, and set channels to “All Channels” to guarantee proper recognition. Load a software instrument and arm a MIDI track to test that you’re receiving signal data and hearing sound output. Keep exploring for advanced configuration tips.
We are supported by our audience. When you purchase through links on our site, we may earn an affiliate commission, at no extra cost for you. Learn more.
Notable Insights
- Connect your MIDI keyboard using USB for power and data transfer, or use 5-pin DIN connectors with separate input/output cables.
- Download and install official drivers from the manufacturer’s website, ensuring compatibility with your operating system and hardware specifications.
- Configure your DAW’s MIDI preferences to enable input, set channels to “All Channels,” and activate MIDI monitoring on tracks.
- Test the connection by loading a software instrument, checking MIDI signal indicators, and adjusting buffer size to minimize latency.
- Troubleshoot issues by testing different USB ports, verifying DAW settings, and using MIDI monitoring tools to track signal flow.
Physical Connection Methods for MIDI Keyboards
When I first started connecting MIDI keyboards to computers, I’ll admit the array of cables, ports, and adapters seemed overwhelming. However, understanding the physical connection methods quickly becomes second nature once you grasp the fundamentals.
Your keyboard likely features either USB ports or traditional 5-pin DIN connectors, with port location typically on the back panel for clean cable management.
USB connections offer superior setup simplicity, requiring just one MIDI cable for bidirectional data transfer, while DIN connections demand separate cables for input and output functions. A significant advantage of USB connections is that they typically provide direct power to your keyboard, eliminating the need for a separate power adapter.
USB’s single-cable approach streamlines MIDI setup compared to traditional DIN connections that require separate input and output cables.
Modern keyboards may also include Bluetooth connectivity for wireless operation across multiple devices without cable limitations. Many keyboards now feature USB-C connectivity which eliminates the need for additional drivers and provides even more reliable plug-and-play functionality.
For audio recording alongside MIDI control, consider that many USB interfaces feature plug-and-play functionality that works seamlessly with both Mac and Windows systems. Quality adapters become essential when dealing with compatibility issues between older keyboards and modern computers, as cheap alternatives can compromise signal integrity and create frustrating connection failures during critical recording sessions. Additionally, professional setups often benefit from audio interfaces with zero-latency monitoring to ensure real-time feedback without delays during MIDI recording sessions.
Installing Drivers and Software for MIDI Devices
Once you’ve established a solid physical connection between your MIDI keyboard and computer, the next hurdle involves getting your operating system to recognize and communicate properly with your device through driver installation.
Driver compatibility becomes essential here, as manufacturers design specific software packages for different operating systems. Before downloading anything, I always verify my OS version and hardware specifications to avoid compatibility headaches later.
| Installation Step | Key Consideration |
|---|---|
| Download drivers | Use manufacturer’s official website |
| System preparation | Close conflicting applications first |
| Manual installation | Navigate to extracted driver folders |
| Validation | Check Device Manager for proper recognition |
| Software utilities | Install proprietary control applications |
My installation tips include disabling antivirus temporarily and maintaining administrator credentials readily available, since most driver installations require elevated system permissions for successful completion. When presented with the device driver options, left click on your preferred driver from the available list to begin the installation process.
Many modern MIDI keyboards offer plug-and-play compatibility with popular recording software and DAWs, eliminating the need for complex driver installations in most cases. Some manufacturers provide comprehensive software bundles that include additional production tools and utilities alongside the basic drivers for enhanced functionality. Ensuring compatibility with DAWs is crucial for seamless integration with your preferred digital audio workstation environment.
Configuring DAW Software to Recognize MIDI Keyboards
Once you’ve got your MIDI keyboard physically connected and drivers installed, you’ll need to configure your DAW software to actually recognize and utilize the device for music production.
The process involves enabling MIDI input within your DAW’s preferences, then testing signal reception to confirm your keyboard’s data is being properly transmitted to the software.
I’ve found this step often trips up newcomers since each DAW handles MIDI configuration slightly differently, but the fundamental principles remain consistent across most professional audio workstations.
Many modern MIDI controllers feature auto-mapping capabilities that automatically configure control assignments with major DAWs, significantly simplifying the setup process for producers.
Enable MIDI Input
The foundation of successful MIDI integration lies in properly configuring your DAW software to recognize and communicate with your connected keyboard, a process that requires attention to both driver installation and software settings.
You’ll need to access your DAW’s preferences menu, typically found under MIDI Devices or similar sections, where you can enable MIDI input for your recognized keyboard by right-clicking or selecting appropriate enable options.
Configure your MIDI channel settings to “All Channels” unless you’re targeting specific channels, and establish device specific configurations that match your keyboard’s capabilities.
Don’t forget to activate MIDI input monitoring on individual tracks, ensuring your DAW receives live note data and control information from your keyboard during recording sessions.
Professional audio interfaces like those used with dynamic microphones require proper gain staging and signal routing, and similar attention to technical details applies when setting up MIDI devices to ensure optimal performance in your recording workflow.
Test Signal Reception
After you’ve successfully enabled MIDI input in your DAW’s preferences, you’ll need to verify that your keyboard’s actually communicating with the software through systematic signal testing, a process that can save you hours of troubleshooting later.
Open your DAW’s MIDI monitor or input indicator, which displays real-time data when you press keys, providing clear incoming signal verification that your connection’s working properly.
I’ve found that arming a MIDI track for recording offers another reliable method for MIDI signal testing, as most DAWs show visual activity indicators when receiving data.
Load a software instrument on the track and play your keyboard-if you hear sound, your setup’s complete and ready for recording sessions.
For optimal performance, consider setting your buffer size between 64 to 256 samples to minimize any latency between your keyboard input and audio output.
Many modern audio interfaces offer zero-latency monitoring capabilities that prevent delays during live recording sessions, ensuring your MIDI keyboard responds instantly to your playing.
If you’re experiencing crackling or other audio issues during playback, consider upgrading to a quality audio interface that can handle your MIDI and audio signals more reliably.
Playing and Monitoring MIDI Keyboards With Virtual Instruments
When you press keys on your MIDI keyboard connected to your computer, virtual instruments transform those digital signals into rich, expressive sounds in real time, creating an immediately responsive playing experience that rivals traditional hardware synthesizers.
Your DAW processes MIDI data including velocity, modulation, and note information while generating audio through virtual instruments for immediate sound production. I’ve found that proper latency management requires optimizing buffer sizes and audio drivers to maintain tight performance feel.
| Control Type | Virtual Instrument Response | Creative Impact |
|---|---|---|
| Velocity | Dynamic volume and timbre | Expressive playing |
| Modulation | Real-time effects control | Emotional depth |
| Aftertouch | Sustained parameter changes | Natural articulation |
| Pitch Bend | Smooth note shifts | Fluid performance |
| CC Controllers | Multiple parameter automation | Professional polish |
Your keyboard’s velocity-sensitive keys and aftertouch capabilities enhance expression, while the DAW combines MIDI and audio signals seamlessly within tracks. Advanced keyboards with weighted hammer action keys provide the most authentic touch response, mimicking the resistance and feel of acoustic piano keys for enhanced playing technique and finger strength development.
Connecting MIDI Keyboards to Ios Devices
When I connect MIDI keyboards to iOS devices, I’ve learned that understanding Lightning adapter power requirements becomes essential, since your iPad won’t always supply enough juice to keep bus-powered keyboards running consistently.
You’ll find that class-compliant devices work seamlessly with iOS, eliminating the driver headaches that sometimes plague computer setups, though you’ll still need to verify compatibility before making purchases.
The real beauty emerges through iOS music app integration, where apps like GarageBand recognize your keyboard instantly, letting you start creating music within seconds of plugging in. For optimal audio quality during your sessions, consider using headphone amplifiers to enhance your monitoring experience and ensure you’re hearing every detail of your musical creations.
Many modern MIDI keyboards also feature Bluetooth connectivity, allowing wireless connection to your iOS device without requiring any physical adapters or power considerations.
For expanded connectivity options, consider pairing your MIDI keyboard with an audio interface that includes MIDI inputs, which can provide additional recording capabilities and professional-grade audio conversion.
Lightning Adapter Power Requirements
While connecting MIDI keyboards to iPads might seem straightforward, I’ve learned through countless troubleshooting sessions that power requirements often become the primary obstacle, not the actual MIDI connection itself. Your Lightning to USB 3 Camera Adapter needs dedicated power input to handle both your iPad and keyboard simultaneously, preventing those frustrating “device not supported” errors that plague basic adapters.
| Power Source | Compatibility Result |
|---|---|
| iPad alone | Insufficient for most keyboards |
| Adapter + charger | Stable operation guaranteed |
| Powered USB hub | Alternative solution works |
Many MIDI keyboards consume around 500mA, while standard iPad chargers provide roughly 1000mA, creating borderline power situations. iOS updates have tightened these limits considerably, making adapter power and iOS compatibility critical considerations for reliable performance.
Class-Compliant Device Compatibility
Although many manufacturers claim their MIDI keyboards work seamlessly with iOS devices, I’ve discovered that true class-compliant compatibility varies dramatically between brands, models, and even firmware versions within the same product line.
The class compliant benefits become apparent when you find devices that actually work as advertised, eliminating driver headaches and providing instant plug-and-play functionality through Apple’s Camera Connection Kit or Lightning adapters.
In today’s device market, brands like IK Multimedia’s iRig series, Yamaha’s CK61/CK88, and Roland’s FP-90X consistently deliver reliable iOS compatibility.
However, I’ve encountered supposedly compatible keyboards that require external power hubs or simply refuse to connect, despite manufacturer claims.
Always verify specific model compatibility before purchasing, as even within established product lines, newer firmware updates can unexpectedly break iOS functionality.
Ios Music App Integration
Once you’ve identified a truly class-compliant MIDI keyboard that works reliably with iOS devices, the actual connection process becomes surprisingly straightforward, though I’ve learned that success depends heavily on using the right adapters and following a specific sequence of steps.
For Lightning port devices, you’ll need Apple’s official Lightning to USB Camera Adapter, while USB-C iPads work with basic USB-C to USB adapters.
After connecting your keyboard, open your chosen iOS music app to enable automatic MIDI input recognition. Most apps default to MIDI Channel 1, which simplifies initial setup considerably.
The beauty of iOS keyboard functionality lies in its plug-and-play nature-most class-compliant controllers require zero driver installation, making MIDI app integration refreshingly effortless compared to traditional computer setups.
Many modern digital keyboards also feature Bluetooth MIDI functionality, which eliminates the need for physical adapters and provides wireless connectivity for a cleaner, more portable setup.
Troubleshooting Common MIDI Connection Issues
Even when you’ve followed every setup step correctly, MIDI keyboards can sometimes refuse to cooperate with your computer, leaving you staring at a silent DAW while questioning your life choices.
Nothing quite matches the existential dread of a perfectly connected MIDI keyboard that stubbornly refuses to make a single sound.
When your MIDI signal decides to vanish, systematic troubleshooting techniques become your best friend. Start by testing different USB ports directly on your computer, avoiding hubs that can create bandwidth conflicts.
If that doesn’t work, boot into Safe Mode to eliminate driver conflicts, then reinstall your MIDI drivers from the manufacturer’s website. Check your DAW’s MIDI input settings, ensuring the device appears in the routing menu.
Sometimes disconnecting other USB devices resolves interference issues, and don’t forget to test your USB cable on another device to rule out hardware failure. For persistent connectivity problems, consider upgrading to a dedicated audio interface with MIDI I/O ports, which often provides more stable connections than direct USB-to-computer routing. For audio monitoring during troubleshooting, consider using wired headphones as they offer immediate response times that are critical for identifying timing issues during performance testing.
Frequently Asked Questions
Can I Connect Multiple MIDI Keyboards to One Computer Simultaneously?
You can connect multiple MIDI keyboards simultaneously through MIDI device compatibility settings and USB hub options. Set each keyboard to unique MIDI channels, use powered USB hubs, or daisy-chain via MIDI thru ports for superior performance.
What’s the Difference Between MIDI and Audio When Recording?
MIDI advantages include editing notes, changing instruments, and small file sizes since you’re recording performance data. Audio limitations involve larger files and less flexibility because you’re capturing actual sound waves that can’t be easily modified.
Do I Need an Audio Interface if I’m Only Using MIDI?
You don’t need an audio interface for MIDI-only use if your keyboard has USB MIDI connection. However, MIDI interface benefits include connecting older keyboards and providing dedicated MIDI ports for reliable data transmission.
How Do I Transpose or Change Octaves on My MIDI Keyboard?
You can transpose using dedicated octave up/down buttons on your MIDI keyboard or through DAW-based MIDI keyboard shortcuts. These octave shifting techniques let you access different pitch ranges without manually playing outside your keyboard’s physical key range.
On a final note
You’ve now got the essential knowledge to connect your MIDI keyboard to any system, whether it’s your computer’s DAW or your iOS device. While I’ll admit the initial setup can feel overwhelming, especially when driver issues rear their ugly head, you’ll find that most connections work seamlessly once configured properly. Trust me, the creative possibilities you’ll reveal through these reliable MIDI connections make every troubleshooting session worthwhile.